
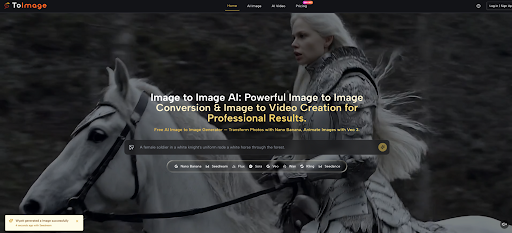
The pace of AI model announcements in 2026 has been relentless, but the quieter frustration among character designers, art directors, and concept artists is not a lack of new engines. It is the gap between having a rough sketch or a mood photo on the table and needing to see ten distinct visual directions before the next meeting, without starting from a blank text prompt each time. That is the space where Image to Image positions itself, and I wanted to understand whether it can genuinely serve as a visual brainstorm partner rather than just a filter on top of an existing image. Over multiple sessions, I fed the platform one concept sketch and asked it to think in every direction at once, tracking where the tool added real exploratory value and where it demanded a human editor.
Why Creative Exploration Often Stalls After the First Idea
The Danger of Settling on a Single Visual Hypothesis
When a team locks onto one sketch too early, the downstream cost can be enormous. A character design that worked in rough pencils may feel flat in a rendered keyframe. A mood board image that looked evocative at thumbnail size can lose all its atmosphere when upscaled. Traditional exploration requires hours of redrawing or re-rendering, and the pressure of a deadline often pushes the team to commit to the first direction that reads clearly enough. The result is not a bad image but a missed opportunity to test whether a different treatment would have resonated more strongly.
What an AI Exploration Partner Could Realistically Change
A tool built around image-to-image transformation changes the economics of exploration. Instead of deciding between reworking an image manually or describing a new idea in pure text, you can keep the core visual anchor (pose, composition, key shapes) and push the treatment in multiple directions in parallel. In theory, this lets you generate a spectrum of renditions before committing to one path for final polish. Whether the platform delivers on that promise depends heavily on how well it preserves the anchor while giving each direction enough visual distance to feel like a genuine alternative. My testing was designed to stress exactly that balance.
A Real Test: From One Rough Sketch to a Full Style Spectrum
The Starting Point and the Exploration Brief
I used a single rough character sketch: a figure in a long coat, standing in a neutral stance, with a hint of an urban backdrop sketched in loose lines. The task was not to make the sketch polished but to generate at least eight to ten finished-looking directions across realism, stylized illustration, painterly treatments, and genre-specific moods, all while keeping the character recognizable. If the platform drifted too far from the source, the exploration would lose coherence. If it stuck too close, the directions would feel like minor color adjustments rather than real alternatives.
Watching the Platform Translate a Sketch Across Modes
Realism Experiments: Does the Model Preserve Material and Form
I prompted for a photorealistic treatment with cinematic lighting, wet pavement, and neon reflections. The output, generated through the Nano Banana model, translated the coat into a textured fabric with visible weave and subtle highlights. The face took on realistic skin shading while retaining the original sketch’s proportions. What impressed me was less the realism itself and more the model’s restraint: it did not add facial features that contradicted the sketch’s implied structure. In other iterations, loose background lines became credible city elements without overpowering the subject.
Stylized Outputs: From Cyberpunk to Watercolor in Seconds
Switching the prompt to “watercolor illustration, soft washes, white space, editorial” produced a result that genuinely read as a different medium. The lines loosened, the coat became a wash of blue-gray, and the urban backdrop dissolved into abstract splashes. I then prompted for a graphic novel style with heavy inks and flat colors, and the platform responded with bold contour lines and a palette that felt pulled from a printed page. Across these runs, the subject remained identifiable, though small details like hand poses occasionally simplified in more abstract styles. For pure exploration, this range was productive; for final asset delivery, further manual cleanup would be needed.
Exploration Outputs at a Glance
| Style Direction | Anchor Preservation | Visual Distance from Source | Prompt Sensitivity |
| Photorealism | High, facial structure and pose stayed intact | Moderate, environment shifted dramatically | Responded well to lighting and atmosphere cues |
| Watercolor Illustration | Moderate, major shapes held but details softened | High, medium and texture completely reinterpreted | Required clear medium keyword and color notes |
| Graphic Novel Style | High silhouette retention, simplified internal detail | Moderate, line weight and color palette changed strongly | Inking style descriptions helped significantly |
| Cyberpunk Mood | High, character silhouette remained stable | Moderate to high, background and lighting fully transformed | Atmosphere and lighting terms were the main drivers |

This table reflects what I observed across a single exploration session. Results will shift with a different sketch, but the platform’s ability to hold the anchor while varying the treatment was consistent enough to trust as a brainstorming method.
The Four-Step Process for an Image-to-Image Exploration Session
Step 1: Load the Foundation Image
Why the Quality of Your Upload Shapes Every Result
The exploration begins by visiting the platform and uploading a PNG, JPG, or GIF file within the 10MB limit. No account creation is required to start, which lowers the barrier when you are in the middle of a creative sprint. The source image appears immediately in the workspace. I found that the clarity of the original sketch mattered: a cleaner line drawing gave the model more to interpret, while a heavily smudged scan introduced occasional artifacts. Uploading the best available version of your concept is not a technical requirement so much as a practical one.
Step 2: Direct the Transformation with Words and Model Choice
Prompting as a Creative Brief Rather Than a Technical Command
Once the image loads, you type a text prompt describing the desired transformation and select the AI model from the visible options. For creative exploration, I used Nano Banana most often because its support for reference images and its realism handling suited the range of styles I wanted to test. The prompt structure that worked best treated each generation as a mini creative brief: specify the medium, the lighting mood, the color approach, and any elements to preserve or change. Vague prompts generated vague results, which slowed down exploration.
Step 3: Assess the Generation and Decide the Next Move
Reading the AI’s Response to Your Creative Direction
Generation time was reasonable for iterative work, and the output appeared in the workspace with the source image still visible for comparison. I evaluated each result for three things: whether the character remained recognizable, whether the direction felt distinct from the previous ones, and whether any unwanted artifacts required correction. When a generation missed the mark, the cause was usually an overloaded prompt asking for too many simultaneous changes.
Step 4: Refine and Capture the Variations Worth Keeping
Knowing When to Stop Iterating and Start Curating
Small prompt tweaks produced noticeably different results, which is useful but can also lead to endless chasing. I learned to set a hard limit for each direction: three generations and then move on. Once satisfied with a variation, I exported it. Completed images are watermark-free and carry full commercial usage rights, which matters if the exploration outputs might directly feed into pitch decks or client presentations.
Where Creative Exploration Meets Practical Limits
When the Model Holds On Too Tightly to the Source
In some runs, the platform was too conservative. Asking for a complete style overhaul while radically altering the environment sometimes resulted in an output that looked like the original sketch with a subtle filter rather than a bold new direction. This happened most often with Flux Kontext, which by design prioritizes layout preservation. For strict editing tasks that is a strength; for wild creative exploration it can feel like a handbrake.

The Unpredictable Gem and the Unusable Surprise
The flip side is that some generations, particularly in abstract or highly stylized modes, produced visually striking results that strayed too far from the source to be useful for the original brief. A beautiful ink-wash image that loses the character’s pose is interesting but not directly applicable. Working with Image to Image AI means accepting that exploration generates both usable directions and creative detours, and the user’s judgment remains the filter that separates them.
What the Platform Contributes to a Creative Workflow
ToImage.ai is not a replacement for a skilled concept artist who can make deliberate choices about anatomy, lighting, and narrative. It is a multiplier for the moment between having one rough idea and needing to see many. The structured upload-to-export path, the clear model selection, and the wide style range combine to make the tool feel like a visual brainstorming partner that works at machine speed while respecting the anchor you give it. For creative professionals who already know what their source material looks like and need to see what else it could become, this platform earns a legitimate place in the pre-production toolkit.


Leave a Reply